Marionberry Pie Recipe With a Flaky All-Butter Crust
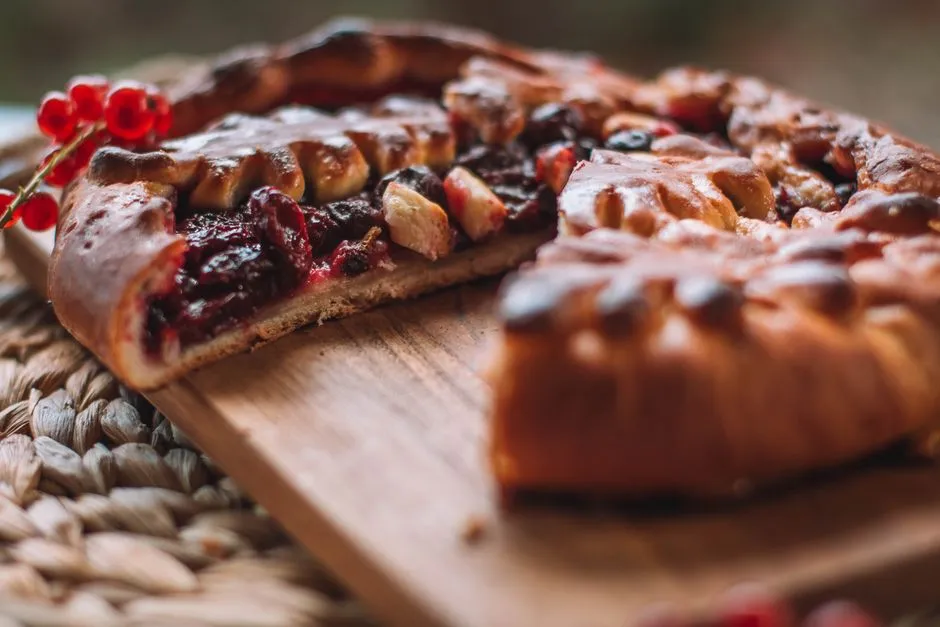
The Marionberry Pie Recipe, at a Glance
A classic marionberry pie is a double-crust berry pie made with about 6 cups of marionberries, sugar, cornstarch, and lemon juice, baked in an all-butter crust at 425°F (220°C) then 375°F (190°C) until the filling bubbles thickly through the vents. Marionberries — the deeply flavored blackberry cultivar developed in Oregon — release more juice than most berries, so this filling carries a full 1/4 cup (30 g) of cornstarch for 6 cups of fruit and a bake that runs until those juices visibly boil. Get the starch, the bubble cue, and the cooling right and you get clean slices with glossy, jammy filling instead of purple soup.
The recipe makes one 9-inch pie, serving 8. Plan on about 7 hours from flour to first slice: roughly 45 minutes of hands-on work, at least 1 hour chilling the dough (it can rest up to 2 days, which is the easiest way to split the job across two days), 15 minutes freezing the assembled pie, 60 to 70 minutes baking, and a minimum 4-hour cool. Most of that is waiting, but none of it is optional.
What Is a Marionberry, and Why Does It Make a Better Pie?
A marionberry is a blackberry cultivar bred in Oregon and named for Marion County, where it was first tested. It's a cross of earlier blackberry varieties, and nearly the entire commercial crop still grows in Oregon's Willamette Valley, with fresh season peaking in July. The rest of the year, marionberries are widely available frozen — and frozen berries make an excellent pie, with adjustments covered below.
Marionberry vs. Blackberry in Pie
You can bake this pie with standard blackberries, but the two behave a little differently:
| In pie | Marionberry | Common blackberry |
|---|---|---|
| Flavor | Intense, wine-like, balanced sweet-tart | Milder and often sharper, without the deep wine note |
| Texture | Softer, smaller seeds, very juicy | Firmer, larger seeds, holds its shape more |
| Juice released in baking | Very high — use the full 1/4 cup (30 g) cornstarch | Moderate — 3 tablespoons (23 g) cornstarch is enough |
| Where you'll find them | Fresh in Oregon in July; frozen elsewhere | Fresh and frozen nationwide |
The practical takeaway: marionberries collapse readily and give up a lot of juice, which is exactly why they taste so good in pie — and exactly why the thickener amount below is not optional. If you swap in blackberries, drop the cornstarch to 3 tablespoons (23 g), since they run less. Taste one first: if they're sharply tart, add up to 2 tablespoons more sugar. Everything else in the recipe stays the same.
Ingredients
Weigh ingredients where grams are given — it's the single biggest upgrade to crust consistency.
All-Butter Crust (Double Crust, 9-Inch)
- 2 1/2 cups (300 g) all-purpose flour
- 1 tablespoon (12 g) sugar
- 1 teaspoon fine sea salt
- 1 cup (226 g) cold unsalted butter, cut into 1/2-inch cubes
- 6 to 8 tablespoons (90–120 ml) ice water
Marionberry Filling
- 6 cups (about 850 g) marionberries, fresh or frozen
- 3/4 cup (150 g) granulated sugar
- 1/4 cup (30 g) cornstarch (see the thickener section for tapioca swap)
- 1 tablespoon lemon juice
- 1/4 teaspoon fine sea salt
- 1 tablespoon (14 g) butter, cut into small bits, for dotting
For Finishing
- 1 egg, beaten with 1 teaspoon water
- 1 tablespoon coarse or granulated sugar
Make the Flaky All-Butter Crust
An all-butter crust flakes because cold butter stays in distinct pieces that steam apart in the oven. Everything in this method protects that.
- Combine the dry ingredients. Whisk the flour, sugar, and salt in a large bowl.
- Cut in the butter. Toss the cold butter cubes in the flour, then flatten each piece between your fingertips into rough flakes. Stop while you can still see pea-sized and almond-sized pieces of butter. Uneven is correct.
- Add ice water gradually. Drizzle in 6 tablespoons and toss with a fork. Squeeze a handful: if it mostly holds together with a few dry crumbs, stop. If it crumbles apart, add the remaining water a teaspoon at a time. The dough should look shaggy, not smooth.
- Divide and chill. Split into two disks, one slightly larger for the bottom. Wrap and refrigerate at least 1 hour, or up to 2 days. This rest hydrates the flour and relaxes the gluten so the crust doesn't shrink.
- Roll. Roll the larger disk to a 13-inch circle on a floured surface, fit it into a 9-inch pie plate without stretching, and refrigerate. Roll the second disk to 12 inches for the top and refrigerate it flat.
If the butter softens and gets shiny at any point, put everything back in the fridge for 15 minutes. Cold dough is nonnegotiable.
Mix the Filling (and How to Actually Thicken It)
Marionberry filling fails in one direction: too loose. Berry pies need real thickener because berries are mostly water, and the fix is measuring starch properly and then baking long enough for it to work.
- Cornstarch — 1/4 cup (30 g) for 6 cups of berries — is the baseline here. It sets glossy and slices clean, but it only thickens once the filling reaches a boil, which is why the bake cue below matters more than the timer.
- Quick-cooking tapioca or tapioca starch works at the same weight and gives a slightly clearer, softer set. Let the mixed filling sit 15 minutes before assembling so the tapioca hydrates.
- Flour takes roughly twice the volume for the same power and leaves the filling cloudy. Use it only as a last resort.
To mix: toss the berries gently with the sugar, cornstarch, lemon juice, and salt until no dry white streaks remain. Mix just before assembling — sugar pulls juice out of the berries the moment it touches them, and a puddle of juice at the bottom of the bowl belongs in the pie, not the sink. Scrape all of it in.
Using Frozen Marionberries
Don't thaw them. Toss the frozen berries straight into the sugar mixture with 1 extra tablespoon of cornstarch (5 tablespoons/38 g total) and assemble as usual. The bake changes in one place: keep the 425°F (220°C) stage at 25 minutes, then extend the second, 375°F (190°C) stage to 45 to 60 minutes instead of 35 to 45 — about 10 to 15 minutes longer, for a total bake of 70 to 85 minutes. Shield the crust edges with foil once they're golden so they don't overbrown during the extra time. Thawed berries dump their juice before the starch can trap it; frozen berries release juice gradually as the pie heats, which the starch handles fine. Frozen marionberries are picked in season and frozen quickly, so a February pie from frozen fruit genuinely rivals a July one.
Assemble and Bake
- Heat the oven to 425°F (220°C) with a rack in the lower third. A preheated baking sheet or baking steel on the rack helps set the bottom crust.
- Fill. Pour the filling into the chilled bottom crust, mounding slightly in the center, and dot with the butter bits.
- Top and seal. Lay the top crust over, trim both crusts to a 3/4-inch overhang, fold the edge under, and crimp. Cut 4 or 5 generous vents — you'll be watching them later. A lattice works beautifully too and vents itself.
- Finish. Brush with the egg wash and sprinkle with coarse sugar. Freeze the assembled pie for 15 minutes while the oven finishes heating.
- Bake hot, then lower. Bake at 425°F (220°C) for 25 minutes, until the edges are set and lightly golden. Reduce to 375°F (190°C) and bake 35 to 45 minutes more, for a total of 60 to 70 minutes. Shield the edges with foil if they brown too fast.
- Watch the vents, not the clock. The pie is done when thick juices bubble slowly through the vents — fat, lazy bubbles, not thin liquid ones. Cornstarch only sets once the filling boils, so a pie pulled before visible bubbling will be soupy no matter how brown the crust is. If the timer runs out and nothing is bubbling, shield the edges and keep going.
Cool, Slice, and Store
Cool the pie on a rack for at least 4 hours before cutting. The filling finishes setting as it cools: slice at 1 hour and it will flood the plate, slice at 4 and you get clean wedges. If you want warm pie with ice cream, cool it fully first and rewarm individual slices.
A handful of toasted, skinned hazelnuts, roughly chopped and scattered over each slice, is a very Oregon finishing move. The papery skins are where hazelnuts keep their bitterness, so once they're rubbed off the toasted nuts are sweet, buttery, and faintly savory — a clean counterweight to the jammy berries.
Store the cooled pie loosely covered at room temperature for up to 2 days, then refrigerate for up to 2 more. Don't cover it airtight while it's still warm; trapped steam softens the top crust. To freeze, cool the baked pie completely, wrap it well, and freeze up to 3 months. The reliable way back is to thaw it overnight in the refrigerator, then recrisp it uncovered in a 350°F (175°C) oven for about 20 minutes. Reheating a whole pie straight from the freezer takes far longer — 40 to 50 minutes at 350°F (175°C), tented with foil — since 20 minutes leaves the center still frozen.
Troubleshooting
- Runny filling: almost always underbaking, or cutting early. If the vents never bubbled thickly, shield the crust edges next time and keep baking past the timer.
- Soggy bottom crust: bake on the lower rack over a preheated sheet, and don't skip chilling the assembled pie before it goes in.
- Shrunken, tough crust: the dough was overworked, stretched into the pan, or under-chilled. Handle it less and rest it longer.
- Filling boiled over: the pie was overfilled or the oven ran long. Bake on a rimmed sheet regardless — bubbling over the rim a little is normal for a juicy berry pie.
Building a Northwest Baking Weekend
Marionberry pie shares an oven schedule nicely with bread: the pie's high-heat start fits right after a loaf comes out. If you're building a Pacific Northwest baking repertoire from scratch, start a beginner sourdough loaf the day before, bake it in the morning, and slide the pie in while the oven's still hot. Make the pie dough that same morning and it will have had its full rest by the time the loaf is cool.
More berry and orchard-fruit recipes live in our Pies & Sweets collection.